Carnitas In An Instant Pot
crispy and flavorful shredded pork for tacos, nachos and more

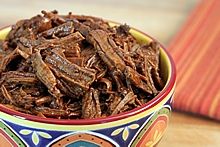
These Instant Pot Carnitas are so flavorful, especially when made extra crispy by putting them under the broiler for a few minutes. Since they freeze and reheat well, I like to keep carnitas on hand for a quick meal of tacos, nachos, or Mexican rice bowls. They're always included in my Mexican Buffets when I entertain.
In a previous post, I explained how to make Carnitas in a slow cooker or on the stove top. Those methods work great, too. The Instant Pot speeds things up and is my choice when I'm home to tend to it and don't need the set-it-and-forget-it lengthy cooking time of a slow cooker.
My previous carnitas recipe focused on making them as low-fat and low-calorie as possible. In this Instant Pot recipe, my goal was to make them as crispy and flavorful as possible. That means using a fattier cut of pork roast and crisping the carnitas under the broiler. To me, this recipe yields the most tasty, authentic results. I love the flavor of caramelized browned bits on carnitas; there's always considerable nibbling when they first come out of the oven...irresistible!
Step-by-step photos for making
Crispy Instant Pot Carnitas
Step 1. Assemble the ingredients. These are the same ingredients I use in my slow cooker carnitas, except for using a different kind of pork roast.
- boneless pork roast -- A pork roast with some visible fat will yield crispier carnitas. Pork butt roasts--often labeled Boston or pork shoulder--are a good, flavorful choice.
- seasoned salt
- ground black pepper
- neutral oil (vegetable, canola, grapeseed)
- chicken broth (store bought or homemade)
- garlic cloves
- onion
- salsa verde (store bought or homemade)

Step 2. Mince the garlic and onion.
view on Amazon: garlic press

Step 3. Cut the pork roast into 3 to 4" pieces. Pat dry with a paper towel and sprinkle with seasoned salt and pepper.

Step 4. Set the Instant Pot (IP) on SAUTE.
view Instant Pots on Amazon: 6-quart (most popular size), 8-quart (for large batch cooking)

Step 5. Add oil and then pork pieces in batches in a single layer, turning to brown on all sides. Remove browned pork to a plate and add remaining pork to IP, brown on all sides and remove to plate.

Step 6. Add chicken broth and deglaze the IP, scraping and stirring in the browned bits from the bottom.


Step 7. Add browned pork back into liquid in IP. Add garlic, onions, and salsa verde.

Step 8. Secure lid on IP and set vent to SEALING. Press MANUAL (it automatically sets it at HIGH PRESSURE), then press the "+" button repeatedly until 60 (minutes) is displayed. When the cooking cycle is complete and the machine beeps, press CANCEL or unplug the IP to turn it off. Allow it to naturally release.
- NOTE: Although actual cooking time is 60 minutes, total time from turning on IP, building pressure, and to the end of the natural release time is approx. 2 hrs 15 minutes.

Step 9. Use tongs to transfer cooked pork to a large baking sheet (I use a 13x18 half-sheet pan); shred it using two forks, removing and discarding any visible pieces of fat.
view on Amazon: Oxo 12-inch tongs


Step 10. Strain cooking liquid left in the IP by pouring it through a wire mesh strainer.
view on Amazon: wire-mesh strainer, mix-and-measure bowl

Step 11. Degrease liquid, if desired. This is optional--some people prefer to leave all of the fat. It's up to you. I prefer to degrease the liquid. There is still enough of the melted fat clinging to the shredded meat to keep it moist and assist in crisping it. Here are 3 ways to degrease the liquid.
- Option 1: spoon grease layer off top-- you can't get it all this way, but you can remove some of it
- Option 2: pour liquid into a grease separator and release grease-free liquid from the bottom (pictured below)
view on Amazon: degreaser

- Option 3: chill liquid completely in refrigerator until fat on top solidifies and can be scraped off. If you're making the carnitas a day ahead, this is the easiest method. Chill the liquid overnight, and the grease easily scrapes off the top the next day.


NOTE: If you chill the liquid, it's likely to gel. That gel is a good sign--it means the broth contains nutritious collagen. It will liquify again when it's reheated. Some of the seasonings may have sunk to the bottom of the bowl, so give everything a stir before proceeding to the next step.

Step 12. Spread out the shredded pork in an even layer on the baking pan. Pour a cup of the degreased cooking liquid over the pork; toss with tongs to evenly distribute.
view on Amazon: half-sheet pan

Step 13. Broil for a total of approx.15 minutes, stopping and stirring every 4-5 minutes, until desired crispiness is achieved. Add additional liquid, as needed, if pork is drier than desired.
- For a moister meat, stir in more liquid after broiling is finished. For dryer/crisper meat, broil (stirring as needed to prevent burning) until all liquid has cooked away.

Those caramelized crispy bits add so much flavor. Yum!

FREEZE IT. Carnitas freeze and reheat well. If I'm making them for a party, I make them well in advance and freeze them. Making ahead reduces party prep stress! I freeze the leftover liquid, too.
SAVE LEFTOVER BROTHY LIQUID! Use it for adding moisture when reheating leftovers.
REHEATING TIP: Reheat carnitas in a hot skillet with a little oil, tossing until heated through and crispiness is restored. If too dry, add some of the leftover liquid.
SERVING SUGGESTIONS:
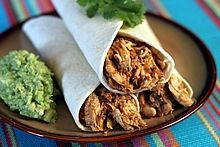
- a filling for tacos, burritos, fajitas, chimichangas, enchiladas or a topping for nachos
- a topping for Mexican rice bowls
- mix it with barbecue sauce and served on a bun for a quick, tasty sandwich
- add it to chili or stew
- add it to grilled sandwich/panini along with melted cheese and additional salsa verde

Make it a Yummy day!
Monica
PREP AND BROWN PORK:
Pat pork pieces dry with paper towels; sprinkle with seasoned salt and pepper. Set Instant Pot (IP) on SAUTE, add oil. Add pork pieces in batches in a single layer, turning to brown on all sides. Remove browned pork to a plate and add remaining pork to IP, brown on all sides and remove to plate. Add chicken broth and deglaze the IP, scraping and stirring in the browned bits from the bottom.
COOK AND SHRED PORK:
Add browned pork back into liquid in IP. Add garlic, onions, and salsa verde. Secure lid on IP and set vent to SEALING. Press MANUAL (it automatically sets it at HIGH PRESSURE), then press the "+" button repeatedly until 60 (minutes) is displayed. When cooking cycle is complete and machine beeps, press CANCEL or unplug IP to turn it off. Allow to naturally release.
NOTE: Although actual cooking time is 60 minutes, total time from turning on IP, building pressure, and to the end of the natural release time is approx. 2 hrs 15 minutes.
Use tongs to transfer cooked pork to large baking sheet (like a 13x18 half-sheet pan); shred it using two forks, removing and discarding any visible pieces of fat.
STRAIN AND DEGREASE LIQUID:
Strain cooking liquid left in the IP by pouring it through a wire mesh strainer.
Degrease liquid, if desired, by (1) spooning grease layer off top, or (2) pouring liquid into a grease separator, or (3) chilling liquid in refrigerator until fat on top solidifies and can be scraped off.
BROIL AND CRISP PORK:
Place oven rack 5-6 inches from broiler and preheat broiler on high. Spread out the shredded pork in an even layer in baking pan. Pour 1 cup of the degreased cooking liquid over the pork; toss with tongs to evenly distribute. Broil for total of approx. 15 minutes, stopping and stirring every 4-5 minutes, until desired crispiness is achieved. Add additional liquid, as needed, if pork is drier than desired.
For a moister meat, stir in more liquid after broiling is finished. For dryer/crisper meat, broil (stirring as needed to prevent burning) until all liquid has cooked away.
FREEZES AND REHEATS WELL. Save any remaining liquid to use for reheating leftovers.
REHEATING TIP: Reheat carnitas in a hot skillet with a little oil, tossing until heated through and crispiness is restored. If too dry, add some of th leftover liquid.
SERVING SUGGESTIONS:
--a filling for tacos, burritos, fajitas, chimichangas, enchiladas or a topping for nachos
--a topping for Mexican rice bowls
--mix with barbecue sauce and serve on a bun for a quick, tasty sandwich
--add to chili or stew
--add to grilled sandwich/panini along with melted cheese and additional salsa verde
More recipes you may like:
Ropa Vieja Shredded Beef recipe
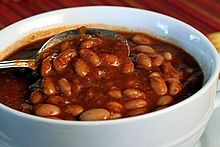
Pinto Beans in Chili Sauce recipe


 Print recipe
 Pin recipe on Pinterest


