
I love a recipe that looks hard and impressive but is really easy to make. This is one of those recipes. You won't believe how easy it is to make these fancy looking bowls.
At Chris and Jillian's wedding reception dinner, the salad was served in delicious edible cheese bowls. They were the talk of our table, and I was curious to figure out how to make them at home. My son, Bracken (aka Brackenthebox), said that he thought you could probably make them in the microwave. That wouldn't have occurred to me, but it sounded like an easy place to start. Worth a try.
Bracken was right. After a wee bit of trial-and-error, I figured out this fast and easy way to make these cheese bowls in the microwave. Other recipes I found for cheese bowls cooked the cheese "pancakes" in a skillet or the oven. I think this method trumps those. This is so easy, and these bowls are absolutely delicious. When I was making them, King-Man walked in the kitchen and said, "Something smells fantastic in here!" Always a good sign. I had an OOPS from my initial experimenting, and he happily gobbled it down. Loved the taste. I was off to a good start.
Use Parmesan or Romano cheese
I tried making these cheese bowls with both kinds of cheese. They were both good, but had some subtle differences. I will demonstrate cheese bowls using both kinds of cheese below. If you're wondering the difference between these 2 hard cheeses, here's my assessment:
- Parmesan cheese is made from cow's milk. It is lower in salt and fat than Romano, and has a milder flavor. For these cheese bowls, Parmesan melts and spreads to form a sturdy, solid base, making them easy to handle and store.
- Romano cheese is made from sheep's milk. It has a higher salt and fat content than Parmesan and has a stronger flavor. For these cheese bowls, Romano melts in a lacy pattern with a pretty, elegant appearance. The Romano bowls are more fragile than the Parmesan bowls, and need to be handled and stored with care. (I think this is what was used for the bowls at the wedding reception.)
Both have pros and cons. I couldn't decide which one I liked better, so I made some of both. You can't go wrong either way, though. They're both delicious.
These are the 2 cheeses I used:
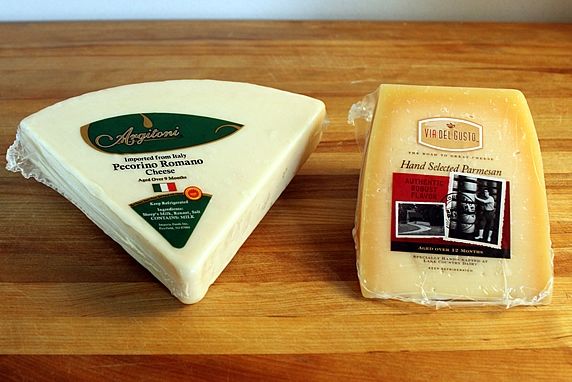
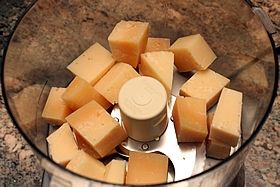
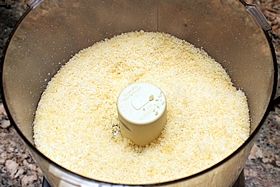
The cheese needs to be fresh, not the dried kind in a can. It should be finely grated with a sand consistency (not shredded or Microplaned). Freshly grated Parmesan or Romano is often sold in deli containers in the dairy or deli section of the grocery store. Or, you can grate your own from a block using a food processor.
How to Grate Parmesan Cheese in a Food Processor
Nutritional Information (for 1 Parmesan cheese bowl): 182 calories, 12.2g fat, 527mg sodium, 2.0g carbs, 0g sugars, 0g fiber,18.2g protein; Weight Watchers PointsPlus: 5
Step-by-step photos for making
Parmesan and Roman Cheese Bowls:
Step 1. Assemble the supplies:
- grated Parmesan or Romano cheese (fresh cheese--NOT the dried stuff)
- 2 nesting bowls that are the desired size of your cheese bowls (view on Amazon: my nesting bowls)
- large micro-wave safe platter or plate with flat bottom; a large dinner plate or pie plate may work, depending on the size of cheese bowl you're making. I used a large quiche dish.
- parchment paper--a good quality non-stick parchment paper; I recommend the Reynolds brand--it's widely available in grocery stores. (view on Amazon: parchment paper)
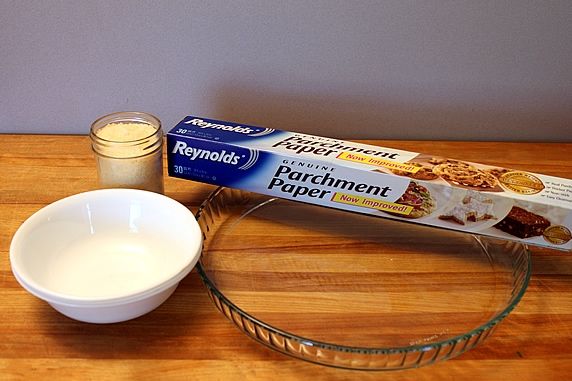
When I say "nesting" bowls, I mean they need to nest tightly like the two below. You can see how these bowls nest with the rims close together. These are sandwiched together to mold the cheese bowls--that's why they need to nest tightly. Chances are that you have 2 bowls that will work. I used these cheapo Corelle bowls--widely available--they have them at my local Walmart (also available on Amazon). They have a 6" diameter across the rim and are 1-3/4 inches high. You can use whatever size bowls you want, depending on how big you want your cheese bowls to be.

Step 2. Cut a piece of parchment paper that will cover the bottom of the plate/platter. (You can reuse the parchment paper for multiple cheese bowls. I made 6 bowls reusing the same piece of parchment paper.)
Step 3. Put grated cheese in center of paper. I used 1/2 cup cheese for my 6" bowl. This example is using grated Romano cheese.
- NOTE: You may have to adjust this for your bowl size, using my size/quantity as a guideline. It may take a bit of trial-and-error to get the amount and size right. Once it's figured out, you can make these bowls quickly, one right after the other.

Step 4. Spread the cheese out into a circle shape. It doesn't have to be perfect. These cheese bowls have uneven edges, by design. Hold an inverted bowl over the cheese circle and make sure the cheese extends 3/4 to 1 inch beyond the rim of the bowl. My cheese circle is approx. 7-1/2 inches in diameter for a 6" bowl rim.

Step 5. Use scissors to trim the corners off of the parchment paper to keep them from bumping against the walls of the microwave as the turntable rotates. (This may not be necessary if you have a larger microwave than mine.)

Step 6. Have an inverted bowl ready to use as a mold when you take the hot cheese out of the microwave.
Step 7. Put the plate of cheese in the microwave and cook at full power until golden brown over most/all of the surface. In my 1100-watt microwave it took exactly 2 minutes. But, microwaves vary, so keep an eye on it until you figure out the cooking time for yours.

Step 8. Remove cooked cheese from microwave; with parchment paper still attached, IMMEDIATELY flip it over the bowl mold, centering it over the bowl. If it's not perfectly centered, it's okay. You'll end up with an asymmetric bowl, and it will look like you planned it that way. So, don't fret about it being perfect.
Step 9. Working quickly before the cheese hardens, take the second bowl and press it over the hot parchment/cheese. Press down to form the cheese into a bowl shape.
- NOTE: You can mold the cheese over the bowl with your hands, but using a 2nd nesting bowl makes it WAY easier; and you won't burn yourself handling the hot cheese.
Step 10. Remove the top bowl and peel off the parchment paper.
VOILA! You've got a cheese bowl. Remove it from the bowl mold, and you're ready to make another one.

OOPS ALERT! Below is a photo of the first cheese bowl I made using poor quality parchment paper that stuck to the cheese. I was able to tear off most of the paper; but as the cheese hardened, it became difficult to get all of the paper off. This is why I recommend Reynolds or Wilton parchment paper. I reused the same Reynolds piece for 6 cheese bowls, and it released easily every time. There are likely other brands that would work fine, too; but Reynolds and Wilton are tried-and-true brands. Don't use wax paper--it will stick.

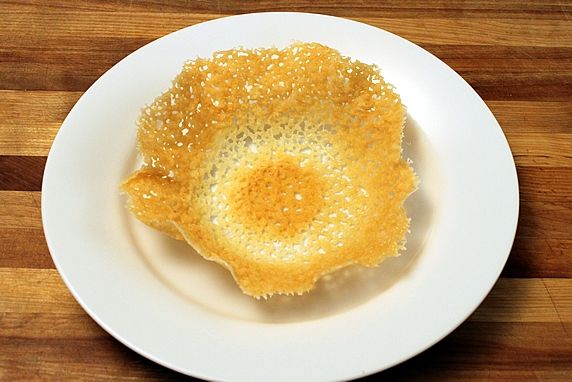
ROMANO CHEESE BOWL - Here's how the cheese bowls turned out when made with Romano cheese. I love the pretty, lacy look. But they're fragile, so be careful when you handle them.
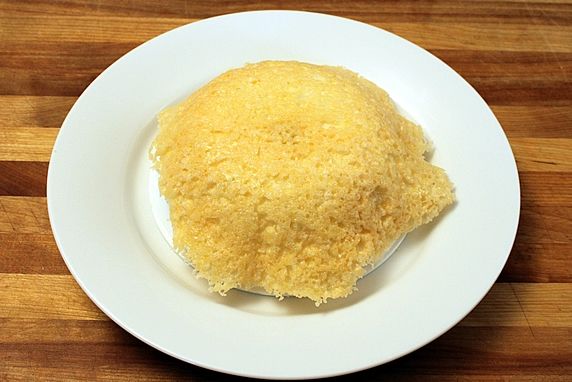
PARMESAN CHEESE BOWL - Here's the bottom of the cheese bowl made from Parmesan. You can see that the cheese spread and puffed up a bit, forming a more solid base.
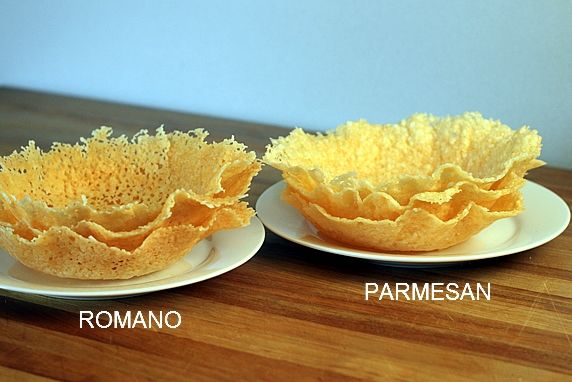
Here are stacks of the 2 kinds of bowls side-by-side. Both look and taste great. You can't go wrong with either one. Once I figured out how to make my first bowl,
it only took 15 minutes to make all six of these.
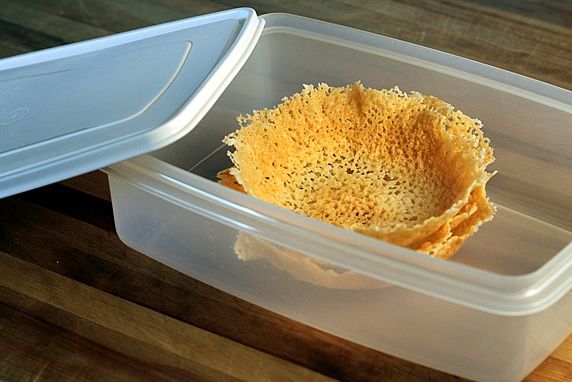
Store the bowls for up to 5 days at room temp in an airtight container. If you don't have a covered container, you can also store them in large Ziplocs.
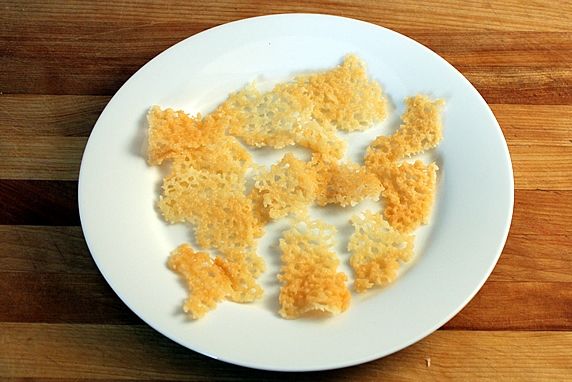
Broken bowls? Don't toss them. Break them into pieces for snacking or sprinkling on salad or soup. Yummy in any shape or size!
MORE IDEAS TO TRY:
- Additional flavors. I played around with adding sesame seeds, Italian seasoning, and garlic powder (not all at the same time) to the cheese before cooking it. It worked and tasted fine. But, honestly, I think the cheese bowls taste just as good, if not better, with nothing added at all. The flavor of the cheese was enough for me. But, feel free to get creative and add some seasonings to your cheese bowls, if you like.
- Appetizer cheese bowls. Use the same technique, with smaller bowls and less cheese. How fun would these be to fill and serve on an appetizer platter?
- Cheese "cracker" wedges. It's easy to make wedges to use for garnishes and snacking. After cooking the cheese round in the microwave, instead of forming it over a bowl, leave it flat and cut it into wedges with a pizza cutter or knife. Do this right away before the cheese hardens, or it will be too brittle to cut cleanly.
TO SERVE, simply fill the cheese bowls with dressed salad greens. It is so delicious to break off pieces of the bowls to eat with the salad. Easy, elegant, impressive.

Make it a Yummy day!
Monica
My Everyday Italian Salad is great served in these bowls!
view salad recipe 
- 2 cups (8 oz) finely grated Parmesan or Romano cheese with a sand consistency (fresh, not dried); don't use shredded or Microplaned cheese
- non-stick parchment paper (Reynolds & Wilton brands recommended; don't use wax paper)
- 2 tightly nesting bowls (desired size for molding cheese bowls)
- large round, flat bottomed microwave safe plate/dish (flat bottom should be at least 1-1/2 to 2 inches larger in diameter than the bowls)
Note: These instructions are for making cheese bowls that are molded around bowls that have a 6" diameter at the rim and are 1-3/4" high. Adjust cheese quantities according to your bowl size.
Nutritional Information (for 1 cheese bowl): 182 calories, 12.2g fat, 527mg sodium, 2.0g carbs, 0g sugars, 0g fiber,18.2g protein; Weight Watchers PointsPlus: 5

This post was updated 5/26/15.


 Print recipe
 Pin recipe on Pinterest
